Scene Converter Tutorial
Introduction
The Scene Converter allows you to convert an entire scene of standard Unity "Tree Creator" Trees into LushLOD Trees, keeping the original positions, rotations and scales of the trees intact.
Convert your trees FIRST!
Before you begin, you need to convert each type of tree in your scene into a LushLOD Tree. The Scene Converter can't do this for you. If you do not already have your LushLOD Tree prefab files ready, you'll need to use the Tree Converter before you can use the Scene Converter. For step-by-step instructions, please see the Tree Converter Tutorial first.
Step 1: Backup your Scene
Open the scene you want to convert, and save it, and create a copy of it. This backup copy will ensure that you can safely undo any changes made by the Scene Converter, in case it doesn't work.
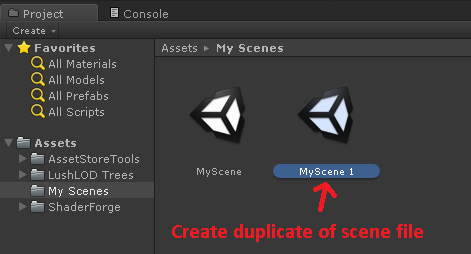
Once you have made a full backup copy of your scene, you can safely perform the conversion and if anything goes wrong, you can simply restore the backup copy that you made.
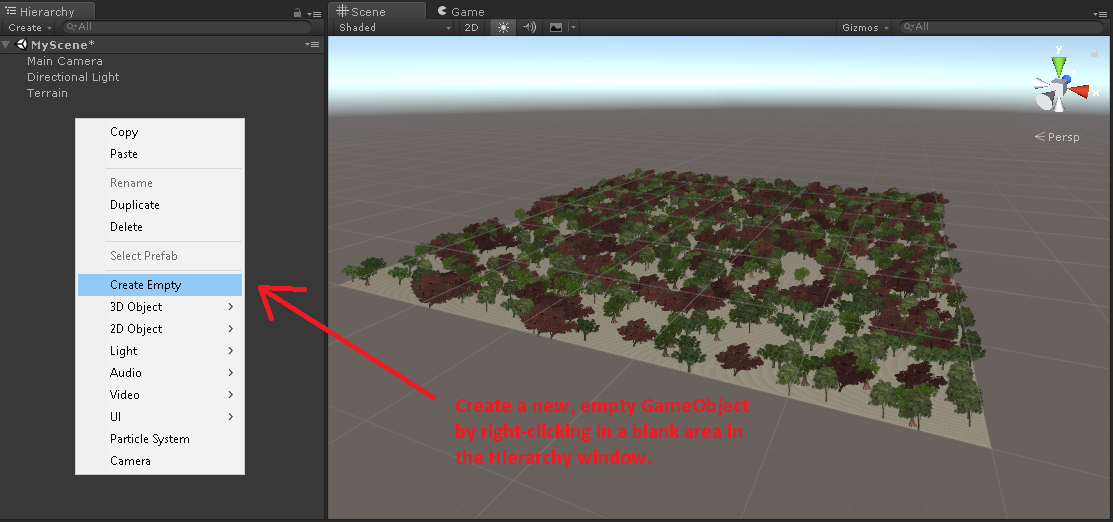
Step 2: Prepare your Scene
Open your scene, and add a new empty GameObject to the scene.
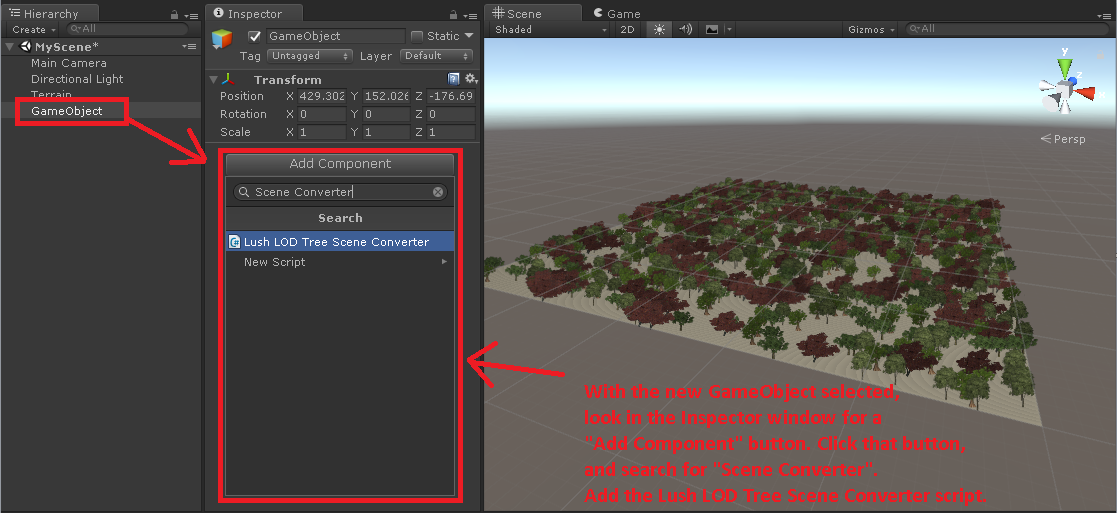
Step 3: Add Scene Converter script
Add the _LushLODTreeSceneConverter script to your new GameObject.
The Scene Converter script is included automatically with LushLOD Trees for Unity version 5.6 or higher. But if you are using an older version of Unity and you don't see the Scene Converter script in your project, you can download the LushLOD Trees v7.5 Scene Converter script at this link: http://tiny.cc/0t7uly
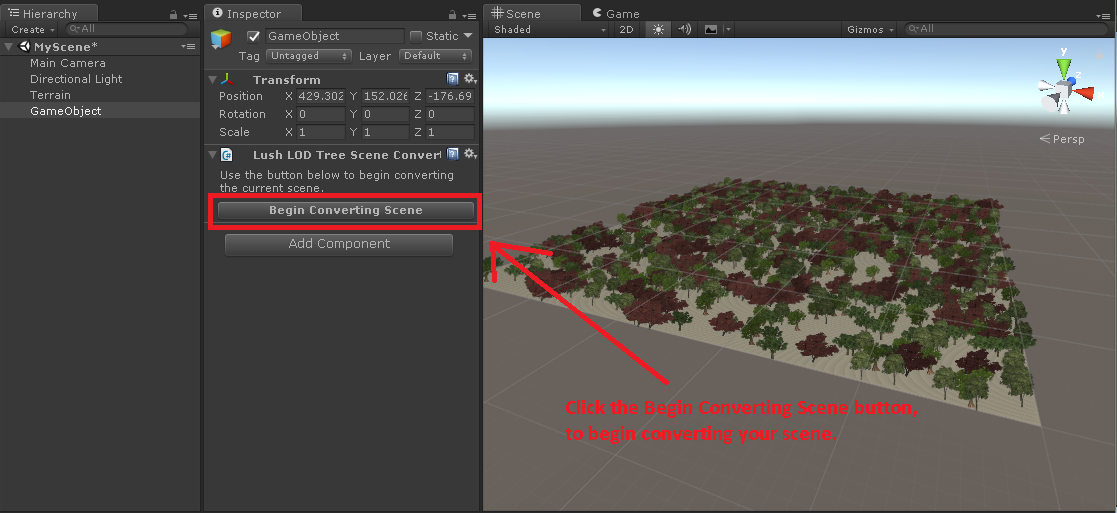
Step 4: Begin Scene Conversion.
Click the Begin Converting Scene button, and follow the instructions.
Step 5: Tree Converter Required!
Before you can use the Scene Converter, you need to have the LushLOD Tree prefab files ready.
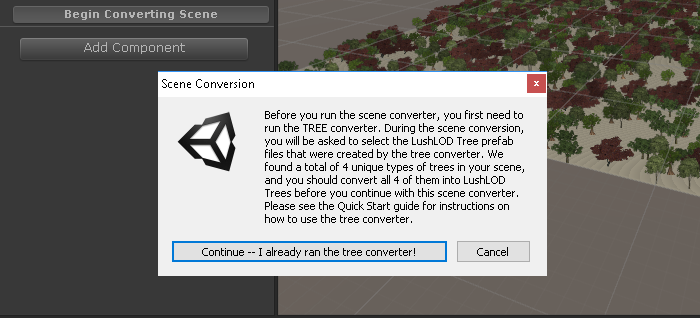
It isn't possible to convert the Unity trees into LushLOD Trees while they are part of your scene. That's because the process of converting the trees requires photos to be taken of each tree at various angles, and perfect lighting is needed for those photos to look good. To do this, you need to use the Tree Converter first. Don't worry, the process is easy and there is a whole tutorial for the Tree Converter to help you. But if you've already got your LushLOD Tree prefab files made, you can simply click Continue.
Step 6: Tree Type Found.
The Scene Converter script will identify a specific tree in your scene, and you will be asked to select the corresponding LushLOD Tree prefab file.
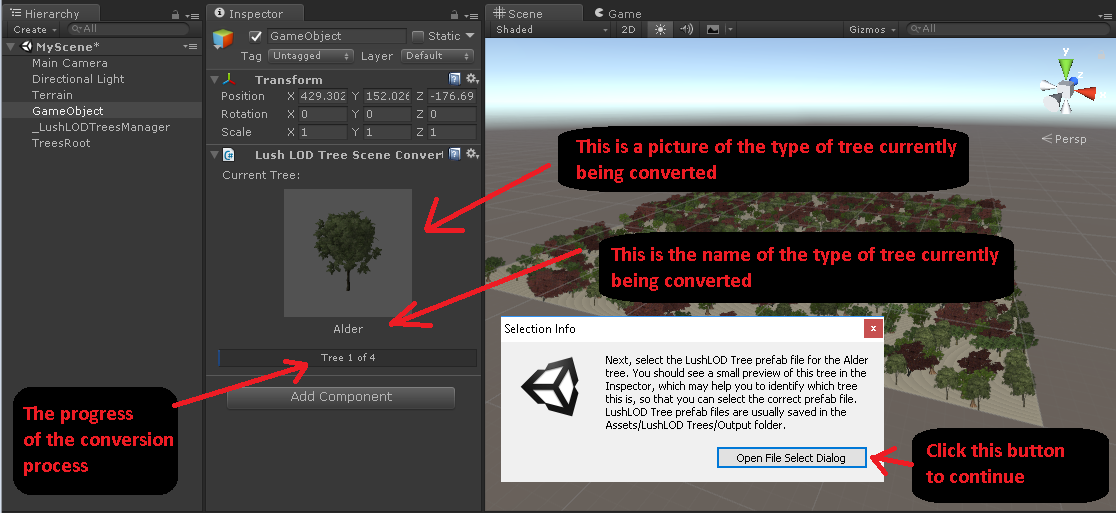
Assuming that you already ran the Tree Converter (or someone else ran it for you), you should have a folder named "Output" which is located at Assets -> LushLOD Trees -> Output. More than likely, your LushLOD Tree prefab files will be there waiting for you. Browse to that folder, and find the *.prefab file that matches the tree that the Converter Script is currently working on.
In the above screenshot, the first tree found was an "Alder" tree. So it is asking me to locate and open the corresponding prefab file (probably named "Alder.prefab"). These prefab files are created by the Tree Converter, which is why you may need to run the Tree Converter before you can complete this step.
If your scene has different types of trees, you probably won't see it asking for an "Alder" tree prefab. Instead, it will ask for the prefab file for whatever is the first type of tree that it found in YOUR scene.
Notice that there is a progress bar that displays the total number of unique trees found. In the above screenshot, I have a thousand trees spawned onto my terrain. But it has identified only 4 different types of trees in my scene.
Go ahead and click the "Open File Select Dialog" button to continue.
Step 7: The Prefab Select Dialog
Most of the time, the prefab will be located in a folder inside of the Assets -> LushLOD Trees -> Output folder. In my case, I'm looking for Alder.prefab which is one of the LushLOD Tree prefab files included with the LushLOD Trees package, and it is found inside of the "STANDARD" folder.
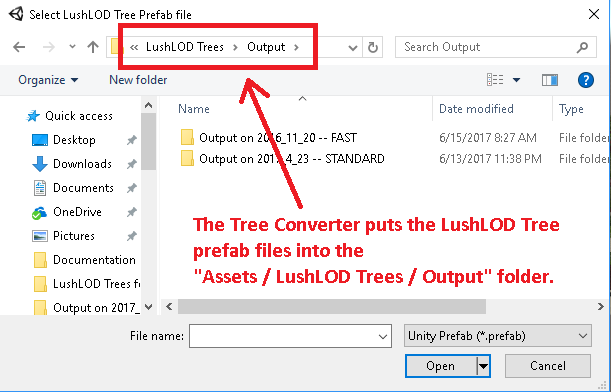
However, if you aren't using the Alder tree in your scene, then you will need to find the prefab file that it is asking YOU for, which will be located in the folder that was created by the Tree Converter during the Tree Conversion process (which you should have already completed before you began this Scene Conversion). Find the Output folder that has the LushLOD Trees prefab file that you need.
Step 8: Find the Prefab File
As you can see in my case, it is asking for a LushLOD Tree prefab file for the "Alder" tree. In your scene, it may ask for a different tree, but the steps will be the same.
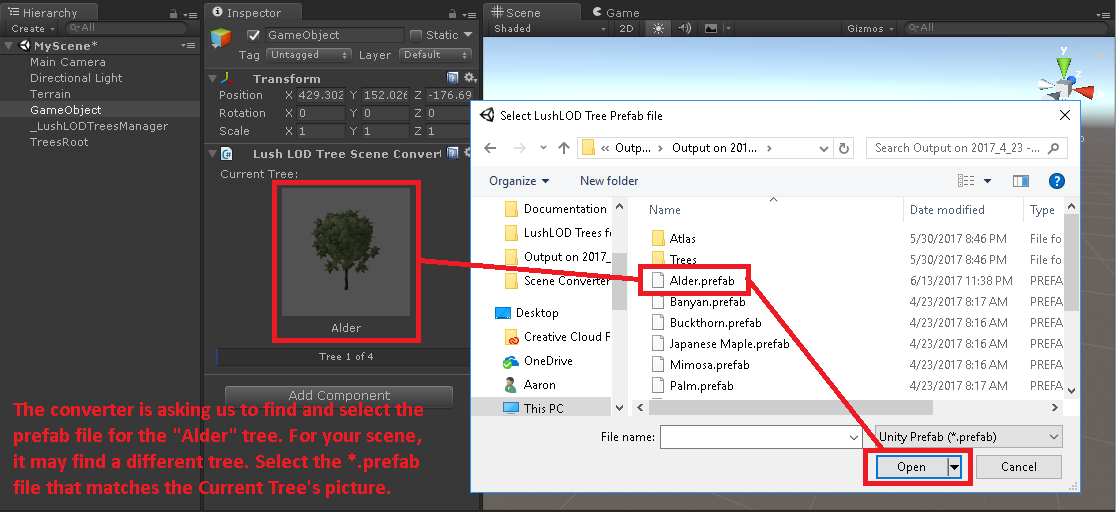
Once you open the prefab file, it will convert ALL of that type of tree in your scene. You will not be asked to select that particular prefab file again.
Continue to repeat the above steps 6 through 8 until you have converted all of the different types of trees in your scene. You will be asked to select the correct prefab file for each unique type of tree in your scene, because there is no reliable way for the Scene Converter script to do that for you.
Step 9: Complete the Scene Conversion
Once you have repeated steps 6 through 8 and all of the different types of trees in your scene have been converted, you will see a button named "Delete Unity Trees". This button will perform the final step of the conversion, which is to remove all the old trees from your scene.
However, if you don't think the conversion process worked, you can instead click the "Start New Conversion" button to start over. You can delete all the LushLOD Trees out of your scene by deleting the TreesRoot GameObject from your Hierarchy, and then use the "Start New Conversion" button to start over and try the conversion again from the beginning. Otherwise, if all else fails, you may need to restore the backup copy of your scene which you made at the beginning of this tutorial.
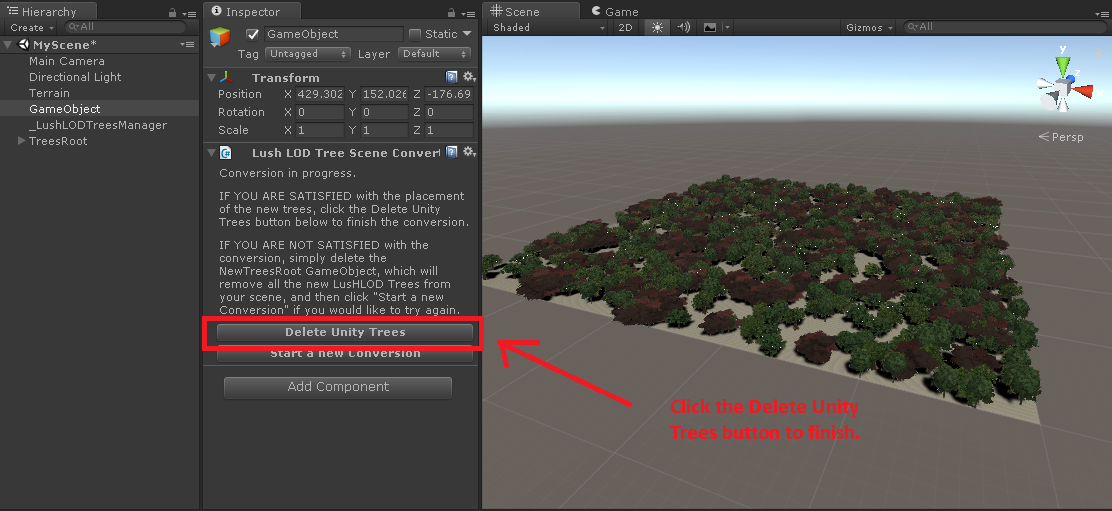
For me, the conversion process was successful so I will now click the "Delete Unity Trees" button to finish.
Step 10: Finish setting up the Manager.
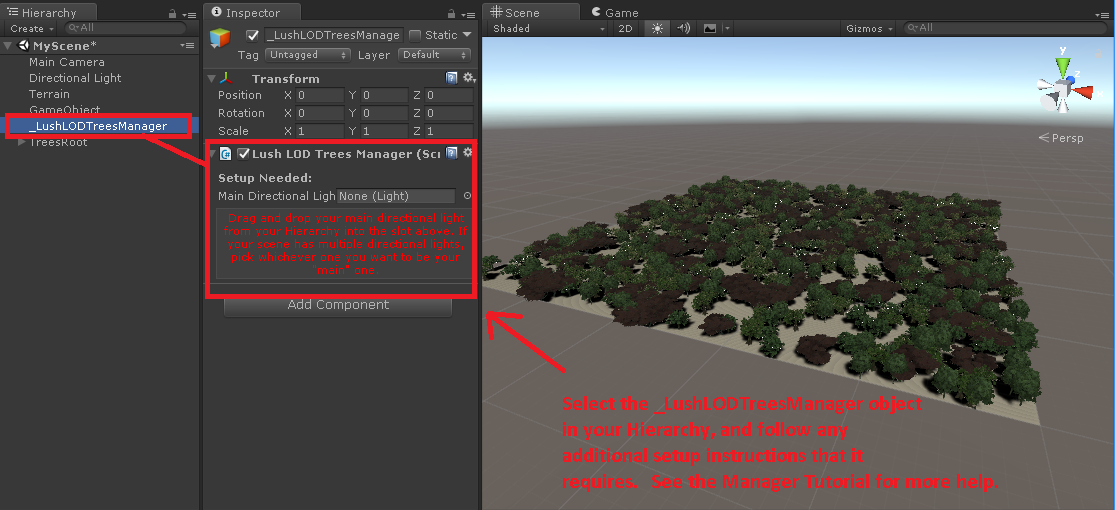
If your scene did not already have a _LushLODTreesManager object in the Hierarchy, one will have been created for you during the conversion process.
Now would be a good time to select the manager, and follow any additional setup instructions that it asks for. Simply select the manager, and look at the Inspector window for any red text, and follow the instructions. See the Manager Tutorial for additional help setting up the manager. Your scene will NOT work correctly until the manager is fully set up, and no more red text appears in the manager's Inspector Window.
All done! Your scene has been converted. Be sure to save the scene now. If it doesn't look right, or if anything isn't working, you may want to open the Gaia Demo scene in the Scenes folder to see an example of what a scene should look like when it is set up correctly.
Customer support service by UserEcho
