Lightmap and Shadow Baking Tutorial (Unity 2018.1)
Lightmap Settings
Using lightmaps to bake your shadows can give reasonably good looking tree shadows, with no frame rate cost.
Note: An online version of this guide can be found at https://lushlodtrees.userecho.com/knowledge-bases/2/articles/82-lightmap-and-shadow-baking-tutorial-unity-20181
Below is a brief explanation of each setting:
- Select _LushLODTreesManager gameobject (it should be in your Hierarchy window, if you followed the installation guide to set up your scene): Then in the Inspector window, scroll down and click the "Ready Shadow Baking" button to enter shadow baking mode.
- Go to Window->Lighting->Settings->Scene:
For the Gaia Demo, I used the settings seen in the image below. Notice that I'm using LushLOD_HQLightmapSettings in the drop down, under Lightmap Settings->Lightmap Parameters. You can find the LushLOD_HQLightmapSettings file in your Assets->LushLOD Trees->Lightmap Settings folder, which is included with the package you downloaded.

- Now close the Lighting Settings window. And select the terrain object, which is in your scene. For the Gaia Demo scene, it can be found in the Hierarchy window, and its name starts with "Terrain" (see the left side of the image below). Then in the Inspector window, under Lighting, look for Lightmap Settings:
I used the settings seen in the above image. Set your Terrain Parameters those found in the file named LushLOD_TerrainLightmapSettings. This file can be found in the Assets->LushLOD Trees->Lightmap Settings folder.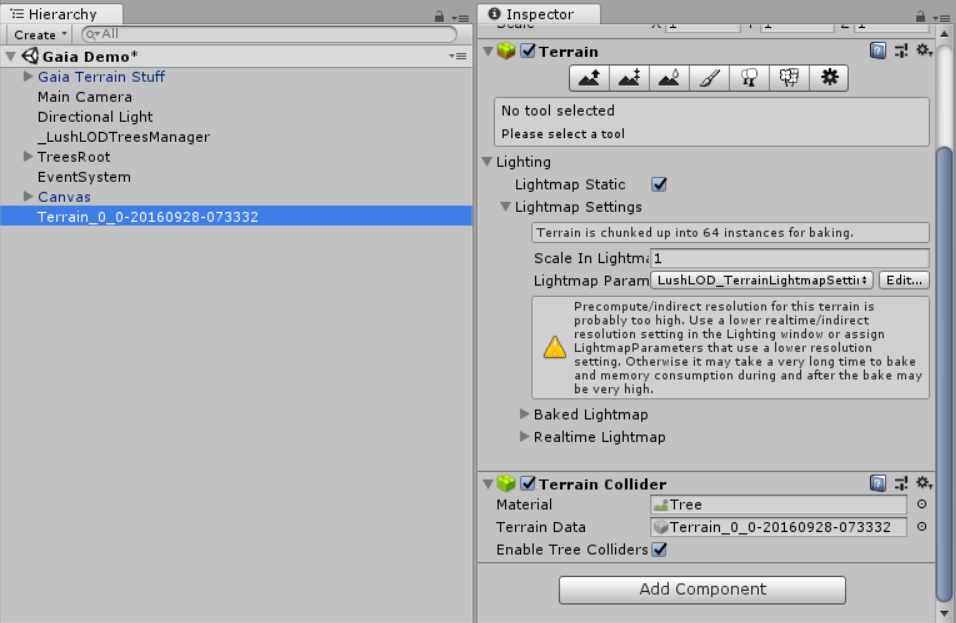
- In the Hierarchy window, there is a little search box at the very top of the window. In that box, search for LOD_1, and then select them all. There are a lot of them, but you can select them all by clicking on the first one, then scroll down, and then hold down shift key while clicking the last one, which should select them all. Once they are all selected, then in the Inspector window, scroll down to Lighting:
For the Gaia Demo, I used the settings seen in the above image. Note that the Scale in Lightmap is set to zero, and the Lightmap Parameters is set to use LushLOD_TreeLightmapSettings, which can be found in the Assets->LushLOD Tree->Lightmap Settings folder, which was included in the package you downloaded.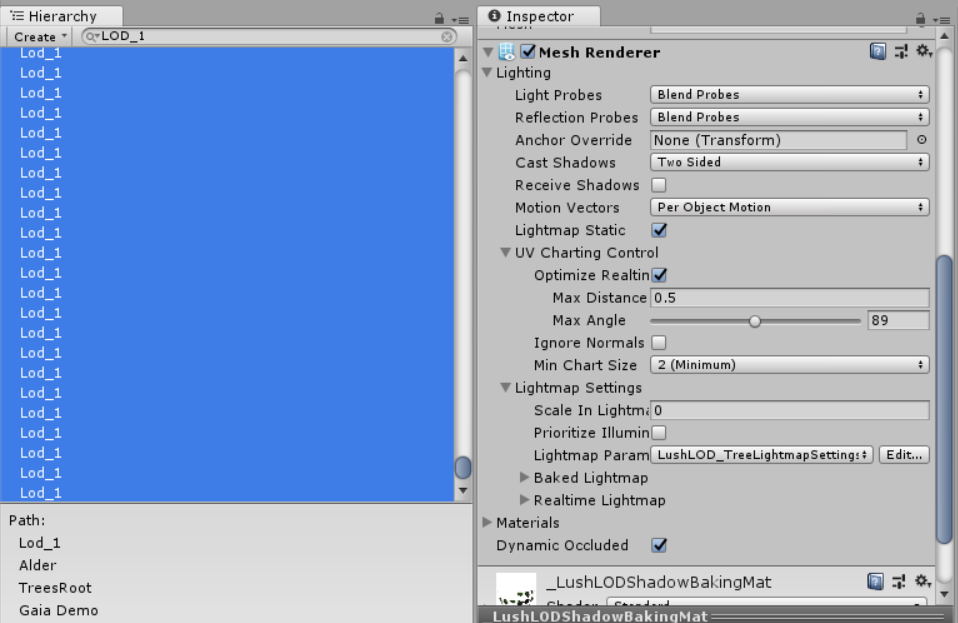
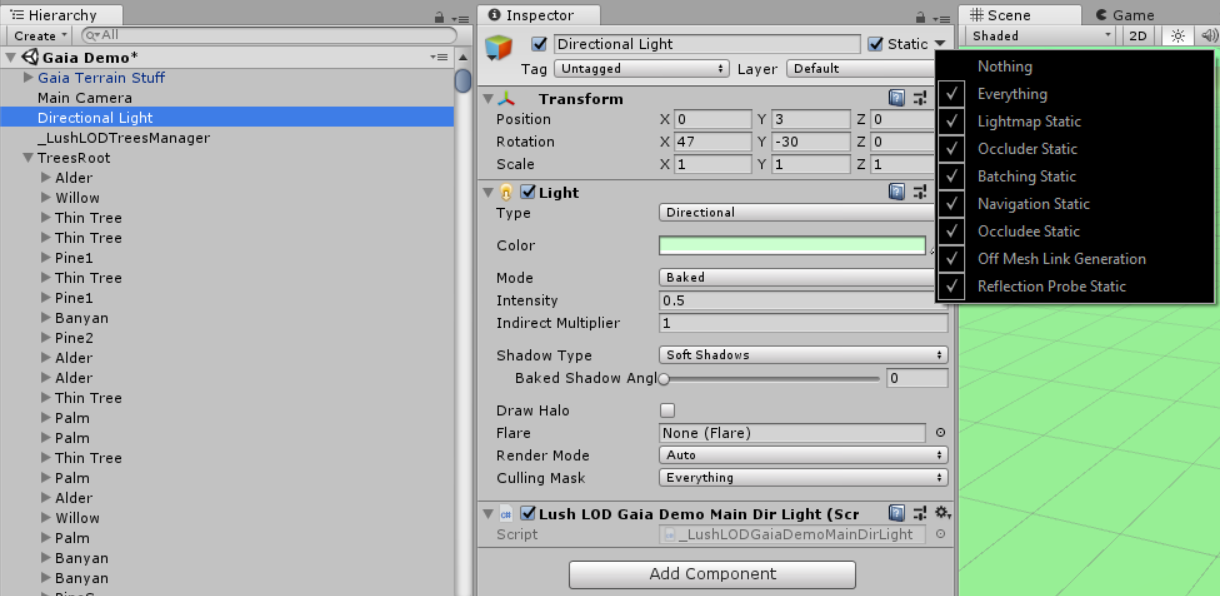
Note that when you clicked on the "Ready Shadow Baking" button (which you did in step 1 at the start of this guide), the high quality tree models were hidden, and only the billboards will be baked. Only the billboards should be enabled during baking. The high quality tree models do not support it. - In the Hierarchy window, clear the previous search you made for LOD_1, so that you can see every object again. Then select your main directional light. Then, in the Inspector window, I used the settings in the image below.
My intensity was set to 0.5, and my Bounce Intensity was 1:
Once you've looked over the above settings, your scene should be ready to be baked. Note that this setup was designed solely to bake the shadows of the billboard trees. If you wish to also bake other objects in your scene, you will need to modify this setup as necessary to make that happen.
Once you are ready, go to Window->Lighting->Settings->Scene and click the "Generate Lighting" button. The process may take several hours for a large scene.
When the bake is finished, go back to the Hierarchy window, and select the _LushLODTreesManager object, and then in the Inspector window, click the "Finished Shadow Baking" button.
Note: Each time you bake your scene, it saves information from the previous bake. If that old information is bugged, you may be unable to finish a bake without errors. If you believe this is happening to you, you can clear your cache by going to Edit->Preferences->GI Cache, and click the "Clean Cache" button. If you have the Gaia Demo scene open when you do this, the trees may turn black, which can usually be fixed by reloading the scene. Before I did my bake, my GI Cache was cleared and empty.
When the baking process is finished, Unity will have created a folder with the same name as your scene (aka "Gaia Demo"), which is located in the Assets->LushLOD Trees->Scenes->Gaia Demo folder. And in that folder you will find a file or files with a name similar to Lightmap...light.exr. The largest copy or copies of this file is probably the terrain. You will most likely want to open these files in Photoshop, and edit their "Hue", "Saturation", and "Levels" to correct the intensity and color of the shadows and lighting. For the Gaia Demo scene, I did something like this:
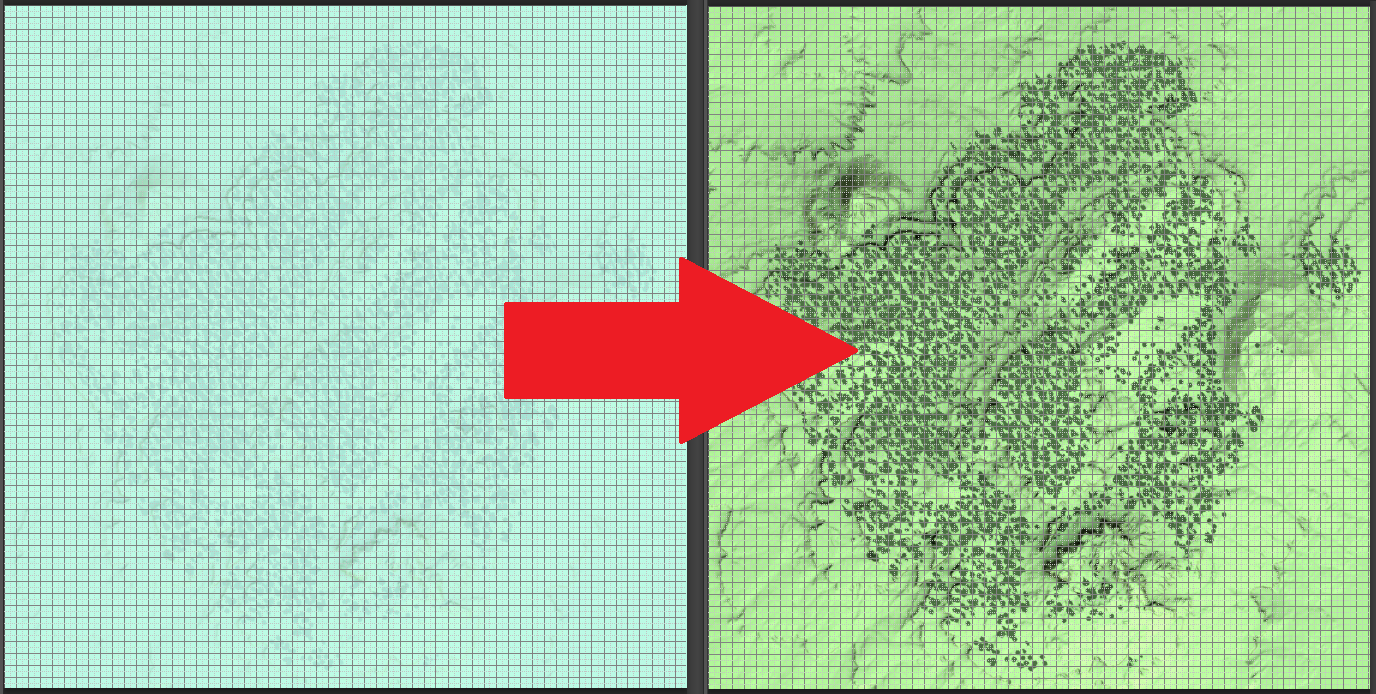
Using Photoshop to improve Levels and Hue, for the Gaia Demo scene.
You're done! You may need to reload the scene to see the final result.
Customer support service by UserEcho
